
How to Grow Dwarf Irises in Containers in 13 Easy Steps
Dwarf Irises, or iris reticulata, are dainty fairies popping up from the soil signaling the end of winter.
Their miniature beauty is enhanced by their timing.
When it seems all of nature is sleeping, dwarf iris wake up and poke their lovely heads out, often in the middle of a snow.
They mark the coming of spring. And hope.
You can grow them in the ground but you can also fill a pot with these little beauties.
You can grow Dwarf Irises in a container filled with good potting soil. Add some water, some sun, and a cold winter. As the temperatures warm in the spring, they will bloom beautifully.
From bulb to beauty.
It's so crazy to see it happen year after year in my cottage garden and to be able to take part in this phenomenon.
AND IT'S SO EASY!
I'll show you just how to create this miracle in your very own container of magic.
How to Grow Dwarf Iris Bulbs in a Container
1. Plant Your Dwarf Iris Bulbs in the Fall
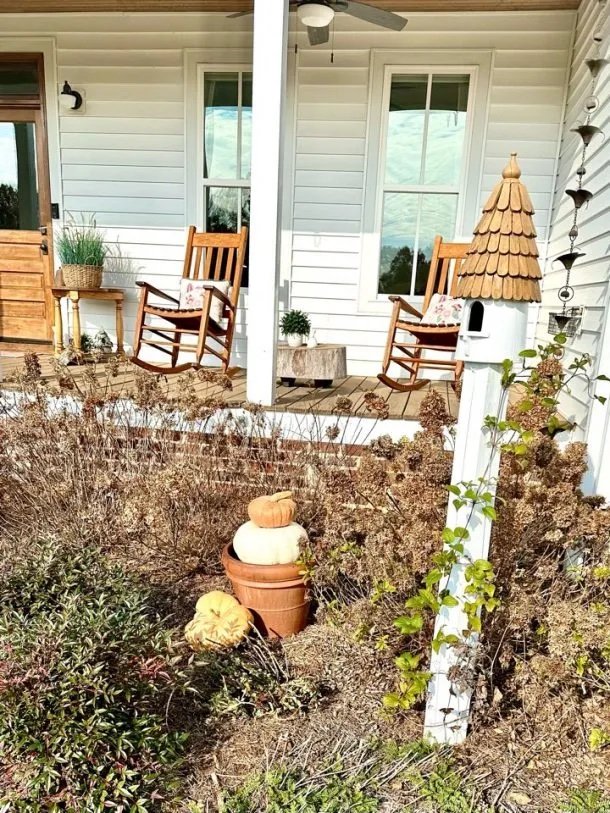
I planted some Dwarf Iris bulbs in this container then tucked the container in my landscaping. I added some pumpkins on top for fall decor.
First of all, be sure to plant your Dwarf Iris bulbs at the right time.
Dwarf Iris bulbs should be planted in the fall when temperatures at night begin to reach between 45-50 degrees.
You can use this as a guideline to know when to plant your bulbs wherever you live.
I’m in zone 7 and always plant my bulbs in October whether I’m planting them in the ground or containers but dwarf irises grow well in Zones 3-8 and even into Zone 9.
2. Choose a Container with Drainage Holes for Happy Bulbs
Dwarf Iris bulbs will rot if they sit in water or soggy soil.
Make sure the container you are using to plant your bulbs has drainage holes at the bottom of it.
If it doesn’t, you will need to drill out some holes if possible.
This assures any excess water won’t be trapped in the container.
3. Dwarf Iris Bulbs Should be Planted about 2-3" Deep
When you buy your Dwarf Iris bulbs, read the packaging to determine the proper depth you should plant them.
If you buy your bulbs individually, ask about the variety of the bulb so you can research it later to determine how deep it should be planted.
Dwarf Iris bulbs should generally be planted 2-3” deep.
As a rule of thumb, bulbs should be planted about 2 times as deep as the size of the bulb.
When you are planting bulbs in a container, you can often get away with planting them shallower than the package instructs.
This is especially true if your bulbs will be in mild temperatures.
The only time I plant my bulbs shallow is if my container is not deep enough.
In that case, I will leave about 3 inches of soil below the bulbs for the roots to develop and just make sure most of the top of my bulb is covered with soil.
I will leave my container in an unheated garage or shed if I choose to plant them that way to ensure they won’t be exposed to temperatures below 32 degrees.
I’ll share more on the temperature below.
4. Fill your Container with a High-Quality Potting Soil
We already determined that Dwarf Iris should be planted 2-3” deep.
Assuming you aim to plant yours 3" deep, measure down from the rim of your container to 3 inches then add 1 inch for a total of 4 inches.
Fill your container with high-quality potting soil up to that 4-inch line.
The extra 1 inch is to account for the space to be left at the top of the container.
It will serve as a basin for water and to prevent any potting soil from being washed away.
If in doubt, err on the side of planting your bulbs too shallow rather than too deep.
If the bulbs are planted too deep, they will not bloom and will decay over time.
So don’t go any deeper than 3 inches.
Feel free to cheat a bit toward the 2-inch line if you aren’t sure.
5. Plant your Dwarf Iris Bulbs Tips Up
Now it’s time to put your Dwarf Iris bulbs in the soil.
Place them with the tips up and the roots down.
When you are planting Dwarf Iris bulbs in a container, you can space them pretty close together.
You can put them so close they are almost touching.
If you don’t have enough Dwarf Iris bulbs to fill your container, don’t stress about it.
Take note of how many you are planting and next spring determine if you want to plant more the following fall.
Keep in mind, Dwarf Iris bulbs will spread.
If you plant them side by side, you will most likely have to dig them up in spring or the following fall to divide and replant.
If you prefer to leave room for the bulbs to spread, plant them about 3-5" apart.
In that case, you will most likely have to divide them in a few years.
6. Cover the Dwarf Iris Bulbs with Soil.

Put your Dwarf Iris bulbs in a container tips up. You can space them so close together they are almost touching if you want. Mine are spaced a couple of inches apart. Then cover with high-quality potting soil.
Cover your Dwarf Iris bulbs with high-quality potting soil or mix being sure the tips remain up.
Cover the bulbs to 1 inch below the rim of the container
Fill the rest of the container with your potting soil.
Be sure the Dwarf Iris tips remain upright and that you leave about an inch at the top of your container.
As I mentioned before, that 1” space serves as a basin to capture water and also prevents the water from washing away the soil.
7. Sprinkle Some Bulb Fertilizer on Top and Water

Spread some fertilizer on top of the soil to encourage root development.
So much depends on the root development of the Dwarf Iris bulbs.
Throwing in some fertilizer isn’t necessary but it might help.
I always do it because I feel like I’m giving my bulbs every chance I can to help them thrive.
After fertilizing, give your Dwarf Iris bulbs a good dose of water to get them off to a good start.
They won’t need a lot of water in the future (remember that bulbs will rot so they don’t need soggy soil).
However, you might want to give them a drink once a week if it doesn’t rain or if you are keeping them in your garage or shed.
Sometimes I go longer than that between watering and they still do well.
8. Protect your Dwarf Iris Bulbs from Being Eaten.
Sometimes squirrels or chipmunks will dig up bulbs and eat them.
Rarely do they eat Dwarf Iris bulbs but in case they do, you can put a screen of some sort over your pots to prevent any critters from being able to get in.
Lay a screen of chicken wire possibly and remove it in the spring.
I never do this and have rarely had a problem, but it might be an issue depending on where you live.
The good news is, deer rarely eat them. So there's that!
9. Keep your Bulbs in 32-50 Degree Weather for 6-8 Weeks.
Temperature is important with Dwarf Iris bulbs.
For the roots to develop at their best, most bulbs need about 6 weeks in temperatures between 32-50 degrees.
If the roots are well-developed, you can feel certain you will have a stunning display of blooms.
If the temperature drops below 32 degrees and your bulbs stay frozen for an extended amount of time, it may deter its ability to perform for you the next spring.
Or it may not sprout out at all.
To prevent your Dwarf Iris bulbs from freezing, you can keep your container in an unheated garage or shed through the winter.
If you are in Zone 7 like me, you can plant your bulbs in a container, leave them outside all winter without worry, and enjoy the blooms in spring. (So easy!)
Most of my containers have enough insulation to withstand our winters.
My only exception is my smaller clay pots.
I will bring them into my garage or shed when I know the temperatures are going to be below freezing for an extended amount of time.
Clay pots don’t offer as much insulation as my concrete planters do so, I tend to baby them a bit.
You can also choose to wrap some form of insulation around your pots if you are unable to move them.
Use bubble wrap or burlap or leaves or mulch or anything you have on hand.
10. Move your Container into the Sun When Temps Reach 50 Degrees.
When you start seeing 50-degree days, move any containers you stored in your garage or shed outside in the sun or partial shade.
Fifty degrees means it’s time for the magic!
Your Dwarf Iris bulbs will start growing and it won’t take long to see the blooms.
If you have containers you left outside all winter, watch them because you are about to be rewarded for all your work.
The Dwarf Iris will burst forth spreading its pixie beauty everywhere.
This is a good time to give them some water if you aren't getting rainwater to help them bloom their best.
Enjoy these oh-so-cute flowers in their prime time.
11. Leave the Greenery Until It Starts Yellowing.
After the Dwarf Iris blooms fade, you will be tempted to just cut the greenery down.
Resist the urge if you want beautiful blooms the following year.
The greenery is taking in nutrients from the sun and storing them down under the soil into the bulb.
Isn’t that crazy?
If you give your bulbs time to feed off our glorious sun, they will return next spring in all their beauty.
Feel free to cut off the spent blooms but leave the greenery.
You might want to move your container behind the shed or hide them away somewhere for this part.
Just be sure the container is getting sun.
12. Store Dwarf Iris Bulbs for Planting Again Next Fall.
You can leave your Dwarf Iris bulbs in your container untouched and expect another show in the spring.
You might want to add another dose of fertilizer to the soil after they bloom if you plan to leave them and give them a chance.
Or you can dig them up, cut off the now yellow or brown stems, and store the bulbs in a cool, dry place.
Make sure they have time to dry out.
Then put them in a brown paper bag and label them.
Next fall, plant them again.
Your Dwarf Iris are a pretty sure bet to perform year after year.
13. Divide Your Dwarf Iris Bulbs After 3-4 Years
If you leave your Dwarf Iris bulbs in the container and they fail to bloom as well, consider digging them up and dividing them.
They may have run out of room.
After dividing, replant them for more blooms.
Easy peasy. Cutie-patootie.

While the Dwarf Iris bulbs develop inside my container, I placed a few pumpkins on top to add some festive to fall in my front bed.
Dwarf Iris bulbs are SO EASY!
If all of the above steps overwhelm you, just put some potting soil in a container, put all the bulbs in, cover them up with potting soil, put them outside, and wait for spring.
They will most likely bloom!
Keep in mind, you are working with nature to grow Dwarf Irises.
Sometimes it just doesn’t work, regardless of how careful you are.
Those times are rare though so go get yourself some bulbs and start planting these cuties!
Spring is coming!
FAQS
Can you plant Dwarf Irises in a Container?
It is easy to plant Dwarf Iris bulbs in a pot. Make sure your container has holes for drainage and you use good-quality potting soil. Plant Dwarf Irises 2- 3” deep. Water and keep cold until spring.
For more details, scroll to the top.
When should I plant my Dwarf Iris bulbs?
Dwarf Iris bulbs should be planted in the fall when temperatures at night begin to reach between 45-50 degrees. You can use this as a guideline to know when to plant your bulbs wherever you live.
I’m in zone 7 and always plant my dwarf iris bulbs in October whether I’m planting them in the ground or containers.
How long do my Dwarf Iris bulbs need to be cold to bloom well?
For the roots to develop at their best, Dwarf Iris bulbs need about 6-10 weeks in temperatures between 32-50 degrees. Good root development translates to the best blooms.
When Will My Dwarf Iris Bulbs Start Growing?
When temperatures reach above 50 degrees, your bulbs will begin to grow. It is truly like magic every spring. If you have them in your garage or shed, be sure to bring them outside in the sun. The sun will draw them on out and give them the nourishment they need.
How deep should I plant my Dwarf Iris bulbs?
Dwarf Iris bulbs should be planted between 2-3” deep. Avoid planting Dwarf Iris bulbs too deep as they will fail to bloom. Err on the side of too shallow when planting Dwarf Iris bulbs.
Scroll to the top for more details.