
How I Grow Violas in Winter Containers: 8 Steps Plus My Tips

Wish you could find a flower that would bloom outside in your containers ALL WINTER LONG?
Violas are one of my go-to winter flowers!
Violas are magic cottage-style flowers that offer cute, pixie blooms and endless color, even in the winter.
They are budget-friendly, gorgeous, and TOUGH.
Not only do they provide blooms in the winter (Zones 6-10), they are also gorgeous in the fall and spring.
If your summers aren’t too hot, they will stick around for most of the summer.
They could be the longest-blooming annual EVER in zone 7 where I am.
I plant them every fall, enjoy them through the winter, then watch them explode with color in the spring. I get 8-9 months of blooms out of them.
They shake off a good frost like it’s pixie dust. A layer of snow freezes them up a bit…then they thaw out and keep doing their thing!
For more ideas on the best flowers to plant in a container for winter, see my blog HERE. I'll share with you my favorites!
Are Violas Pansies?
Pansies come from the viola family. So they are related.
(For more info on how to grow pansies in containers for winter, see my blog HERE.)
But honestly, there is very little difference in the way you plant and grow pansies and violas.

The rose-colored flower is a viola. The pale yellow flower is a pansy. Truth is, all pansies are in the viola family.
There are some technical differences, but violas are smaller.
The sweet bloom sits on one green stem that looks like it is jumping out of the soil as if it is on its tiptoes.
These violas are often known as 'Johnny Jump-Ups.'
Look how cute my mom’s violas are! You can see why they are also called ‘Johnny Jump-Ups.’
The truth is, if you know how to grow pansies, you know how to grow violas. And vice-versa.
Let me give you some tips on how I grow violas in containers in this blog so you can have gorgeous little flowers in winter.
I'll also give you 8 steps on how to plant violas in containers and how to care for them in fall, winter, and spring. Like I said, ALL MY TIPS!
How I Grow Violas in Containers for Winter: 8 Steps
1. Plant your violas in the fall.

This container filled with violas will give me color and blooms all winter long. Plant them in the fall so their roots will be established enough to handle the winter cold.
Planting your violas in the fall will give time for their roots to develop before the cold weather moves in.
I generally plant my violas in October in my zone 7.
2. Water your violas before you plant them.
You will be stressing your violas as you plant them. It’s best to transplant a well-watered viola than a dry one.
You can water your violas a few hours before or even the day before you plant them.
Ideally, you don’t want to plant a viola with dry soil and roots.
You will be stressing the sweet viola as you are planting it.
Well-hydrated violas handle the stress of the transplant better.
3. Add soil 1-2” below the lip of the container.

Choose high-quality potting soil. Add it to your container up to 1″ below the top of the container. This 1″ will serve as a basin to reduce water run-off and prevent the soil from washing away during rain or waterings.
Use high-quality potting soil which prevents the soil from compacting.
Fill your winter container up to 1" below the lip.
The 1” lip at the top of the container will serve as a basin for water.
It will also prevent soil from washing out as you water it or as it rains.
Sometimes I start with 2" at the top as I am planting but aim for 1" on my finished product.
You may have to add soil or take it away, but it's not rocket science.
4. Fertilize the soil with a balanced fertilizer.

I always try to give my violas as much help as possible. A balanced fertilizer encourages root development to prepare the violas for the winter.
Mix a balanced, slow-release fertilizer into the potting soil.
The potting soil I used in my winter container already had slow-release fertilizer mixed in it.
I added some Bulbtone which concentrates a bit more on root growth.
Use your gloved hand to mix the fertilizer into the soil.
5. Remove your violas from the nursery container.

Squeeze the base of the nursery container. turn it upside down, then gently tug on the viola at its base. It should release easily.
Remove your violas from the nursery container.
You can do this by holding on to the side of the container, squeezing it a bit around all sides as you tilt the container upside down gently.
Carefully, pull on the stem of the viola to release it from the nursery container.

These violas came in an 8-pack. They were pretty developed when I bought them evidenced by the root system and that they had grown together.

Gently pull each of these viola cells apart so you will have individual violas to plant. This will give more room for their roots to stretch out when planted.
6. Gently break up the roots of the viola.

You can see this viola has a healthy root system. It was probably ready to be transplanted to a larger container at the nursery. We will take care of that in our winter container.

Break up the roots of the violas gently with your fingers. This encourages the roots to reach out to the soil around them instead of continuing to circle the base of the plant. Stronger roots equal a healthier viola. (Gloves are a good idea! Haha! What is on my hand?)
Sometimes you will see the roots of the pansy swirling around the base of the plant.
Use your hands to delicately break those roots up.
This encourages the roots to reach out into the new soil around them instead of continuing to circle the root base.
7. Plant the violas in the soil 1"-8" apart.

Dig a hole with your hands (garden gloves are a great idea!) put in your viola, then surround it with potting soil. Try not to cover the top of the soil of the viola.
Dig a hole with your gloved hand or a trowel.
Place your viola in the hole level with the soil around it.
Replace the soil around the pansy. (So easy.)
Then move on to planting the next viola.
When planting, aim for the top of the soil in the nursery container to be even with the top of the soil in your new container.
In other words, don’t cover the top of the nursery container soil with your potting soil.

I always plant my violas 1-2″ apart so that I get instant gratification. They will spread, however, so it you want to save some money and give more room for root development, you can space your violas as much as 8″ apart. They will spread and fill in by the following spring.
Space your violas 1 - 8” apart, depending on your budget.
Either way, they will fill in the container fully over time.
The closer you space your violas, the sooner you will have the best show of color.
In a container, I plant my violas 1 - 2” apart.
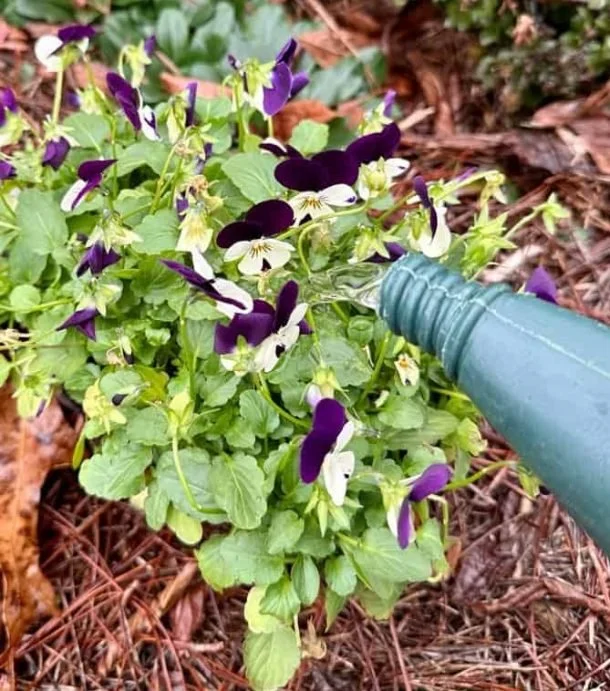
8. Water in your violas.

When you are finished planting your violas, water them in well. I used the water to rinse the potting soil off the leaves of the violas. I have a good drainage hole at the bottom of my container so the excess water will drain out.
These little beauties are stressed with all the changes - being tugged on, the broken roots, the new fertilizer.
Give them a big drink of water to help them adjust to their new environment.
I water them until it runs out of the bottom of my container.
They will reward you with loveliness!
If some of the potting soil settled, you may need to add a bit more potting soil to the top.
Tips on Choosing a Container for Growing Violas in Winter
1. Choose a container with drainage holes.

Violas like to have a good drink of water but they don’t like to sit in water. Make sure your winter container has drainage holes to assure their roots won’t rot.
Violas don’t like their roots sitting in water or soggy soil.
The roots will rot and there’s no coming back from that.
The easiest way to avoid this is to choose a container with drainage holes.
If you overwater, the excess water just drains out the bottom.
Sometimes you have to drill out the holes in the container yourself.
Either way, I always use a container with drainage holes for my violas because it eliminates a potential problem (soggy soil) easily.
2. Choose a container that can handle the winter cold.
Choose a container that won’t freeze and crack during the winter.
Clay pots are porous and are prone to absorbing water.
When the temps drop, they freeze and crack.
Sometimes concrete pots can do the same.
I am in zone 7 and rarely have a problem with either.
My concrete pots are heavy and thick and offer good insulation with no risk of cracking.
Even my larger clay pots have done well.
If you are in a colder area, you might want to consider a polyresin container.
They don’t crack and they offer some insulation, as well.
3. Choose a container with sufficient depth.

The smallest winter container I used this year for my violas was an 8″ clay pot. If the winter gets too fierce for my violas in this smaller container, I will bring them into my unheated garage. (I have pansies planted in the container in the back and bulbs to the left. Also, check out that amazing ‘Ruby Slippers’ hydrangea I planted a couple of years ago. I am crushing on its great fall color!)
Viola roots are not that extensive so you can plant violas in smaller containers.
But if I am planting my violas in the fall, I like to think ahead and protect them as much as possible from the cold winter that is coming.
I use a container that has room for at least 3” below the roots of my violas when I purchase them.
A little more depth provides some insulation for the roots.
Smaller pots often have to be watered more often.
Smaller containers are cute and I love them but they often need more attention.
The smallest winter container I used this year was an 8" pot...and I may end up bringing it in this winter.
Tips on Choosing a Location for your Winter Viola Container

Violas need at least 6 hours of sun every day. Choose a spot where they are sure to get some fun in the sun.
1. Choose a full sun location for your viola container.
Violas will bloom well for you in a location where they receive at least 6 hours of sun in the cooler weather.
Some of my containers get a lot more sun than that and they thrive in the fall, winter, and spring.
Be sure to choose a location where your violas can sunbathe.
2. Move your viola container to a part-sun spot in summer.
If you want to keep your violas blooming happily for as long as possible, consider moving your containers in the heat of summer to a location where they get only morning sun or perhaps filtered sun.
When the temperatures heat up in the summer, violas tend to get leggy and/or wilt.
A part-sun location in the heat of summer will help your violas last longer.
(You can also cut your leggy violas back in the spring and they will return.)
3. Replace your violas with annuals when the temps rise.
Violas can last into July where I live if they are moved to part sun in summer.
Generally, however, I pull up my violas in my containers around May and replace them with summer flowers.
Sometimes this is difficult because my violas may still look good (so hard), but I do it because I know they aren’t going to last much longer in zone 7.
You can take all of this into consideration when determining the best location for your container.
Tips on Choosing Violas for your Winter Container
Which color should you choose?

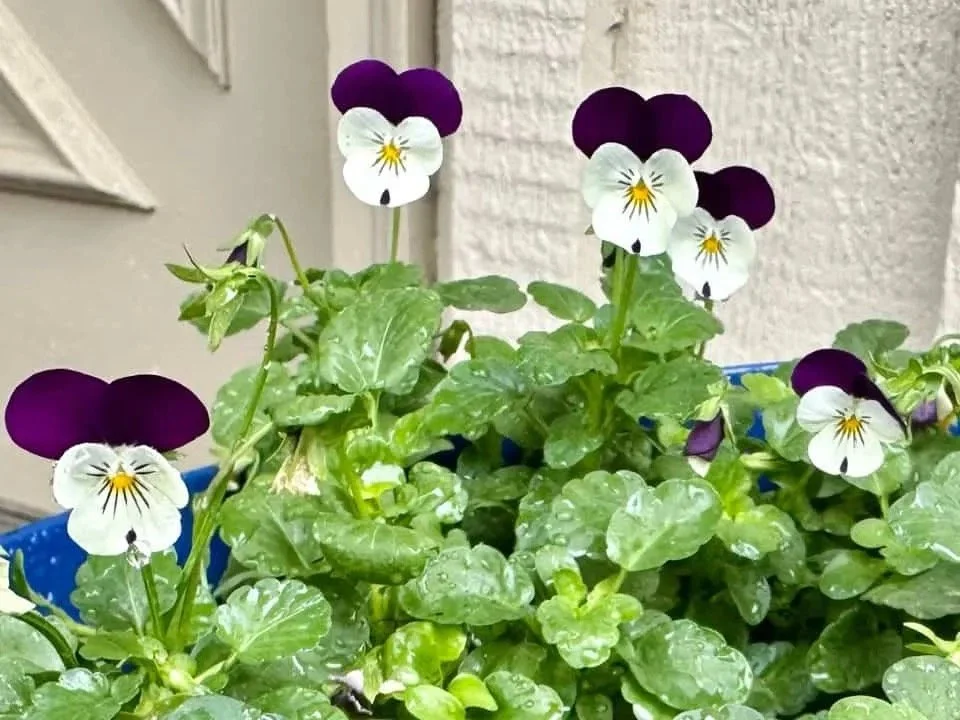
Look at this pretty purple and white viola. Winter violas offer so many color choices so select the one that calls your name.
Don’t let anyone tell you which color to choose. These are YOUR violas!
Just go in and choose the ones that catch your eye first. This is all about what makes you happy.
You can plant all the same color or mix colors. Or you can buy packages that are already mixed.
I have done all of the above at one time or the other.
How many violas should you buy to fill your winter container?
Violas will spread in your container. If you are on a budget, space them 6-8” apart. They will fill in over time. If you want instant impact and can afford it, plant them 1-2” apart. They will fill in even tighter within a few weeks, especially in the spring.

This winter container in my backyard is a combination of violas and pansies. I like to pack them in tight, leaving only about an inch between each viola. You can space them out as far as 8″ if you want to save some money and give more room for root development. They will spread and will fill the container by spring.
Should you buy violas that are already blooming?
I always choose violas that are in bloom so I know I’m getting the color I want and I’m getting instant gratification when I plant them.
After they bloom, you can deadhead them. If they get straggly, you can cut them back by half or even a bit more.
The other option is to choose violas that are just getting ready to bloom.
They might transplant better and you get a younger plant, but you run the risk of getting something (a color or variety) you didn’t choose.
This has happened a lot to me.
Not the end of the world but if I have taken time to decide what I want, then I want to be sure it’s what I’m paying for.
The bottom line, violas are easy.
Buying violas already in bloom is my choice every time but you can make it work either way.
More importantly, check to be sure the violas you select look healthy and full.
How to Care for your Violas in the Fall

This is a container filled with a combination of pansies and violas. I’m not the only one who thinks they are cute and colorful. This Monarch butterfly chose to stop here and have a snack on his way further south this fall.
I prepare my violas for winter in the fall by doing everything I can to ensure their roots are well-developed.
I plant them early enough in the fall to give their roots time to develop.
I fertilize them during planting to encourage root development.
I place them in full sun. (At least 6 hours of sun daily.)
I water them well in the fall (maybe every other day or two until it starts cooling off) to encourage root growth.
Following these tips provide me with the best display of blooms from my violas in the fall but also prepares my violas for the cold weather on the way in the winter.
How to Care for your Violas in Winter

Your violas will be resting through the winter so not much is needed from you. Just make sure they get a good drink of water from time to time.
During the winter, your violas will be resting.
It will be too cold during the winter in zone 7 for root development.
It’s almost as though they are frozen where they are until spring.
Whatever blooms you start with when the cold weather strikes, will be what you should have when the cold weather lifts.
When a frost hits, the violas will shake it off like a refreshing dip in a cold stream.
When the freezing temperatures hit, the violas will freeze and then will thaw out when the weather warms back up.
They are tough little beauties.
Sometimes the cold weather will set them back a bit. Count on them to recover when the temps start warming up.
Here are a few tips for caring for your violas in winter:
Water your violas about once a week if it doesn’t rain throughout the winter when temperatures are above freezing. This will help them endure the cold and ensure they keep performing for you.
Don’t fertilize your violas during the winter. Wait until the weather begins to warm up before fertilizing.
You may want to bring your viola containers into an unheated garage or shed if the temperatures dip below 20 degrees for an extended time. Another option is to cover your containers with evergreen boughs or pine straw to protect them.
I’m in Zone 7 and have never moved my containers or covered them. Even if my violas take a hit during a really cold winter, they have always bounced back for me in the spring. (I LOVE THESE TENACIOUS LITTLE FLOWERS.)
To be honest, I do nothing with my violas in the winter except enjoy their winter color and charm. They are friends of the lazy gardener.
Edited: I did a test on my violas last winter. When the temps dropped below 25 degrees, I covered one on the containers, and left the other uncovered. The difference was remarkable. The covered ones did sooooo much better so I will be covering my violas or bringing them into my garage from now on when the temps dip!
How to Care for your Violas in the Spring

I deadhead my violas before planting them sometimes. I took off all the spent blooms including this seed head. In the spring, deadhead again.
When the temperatures begin to warm a bit in the spring, it’s time to give your violas a good long drink of water.
When you’re sure your violas are well-hydrated, fertilize your violas with a balanced fertilizer. (10-10-10, you can look at the packaging on your fertilizer to see what its NPK rating is.)
Deadhead any spent blooms. Pinch back the stem of your viola, being sure to leave at least a pair of leaves on the stem. This will encourage more flowering.
Keep your violas well-watered through the spring, routinely deadhead them, and fertilize them every couple of weeks.
When the summer heat begins to move in, move your containers to an area that receives only morning sun or filtered sun. Or you can replace the violas in your container with summer annuals.
Honestly, though, all I usually do is make sure my violas are well-watered then I will fertilize them around the first of March.
I might deadhead them if needed. After that, I will water them every couple of days.
I might fertilize them one more time.
They are usually so full and bursting with color at that point, I won’t fertilize them again.
They are like a machine. They produce a mound of relentless color until the heat of summer hits.
I rarely even deadhead them after the initial time, although they recommend it. SO EASY!
Wrapping It Up
In zone 7, where I live, my violas cannot survive the summer heat.
I pull them out around May and replace them with summer annuals.
It is always such a hard thing for me to do because they often still look amazing.
However, I know they only have a few more weeks left in them and I like getting my summer annuals planted in May.
Overall, these little charmers will have lasted for 8 months at my house, remaining in bloom the entire time.
They will have even survived the cold of winter.
They are WARRIORS disguised as sweet cheerful smiles in your container.
You want violas in your arsenal against the winter blues!
Let’s get these beauties in our winter containers!