
5 Secrets to Aging Terra Cotta Pots with Lime: HOW I DID IT

Aging terra cotta pots is so easy and so fun!
You can't mess up with this process and it takes hardly any time.
I can show you step-by-step how I aged my terra cotta pots.
Plus I’ll share some secrets I learned in the process.
This is such a fun project and EASY PEASY!
It’s like an easy art project where everyone gets the coveted ‘A+’.
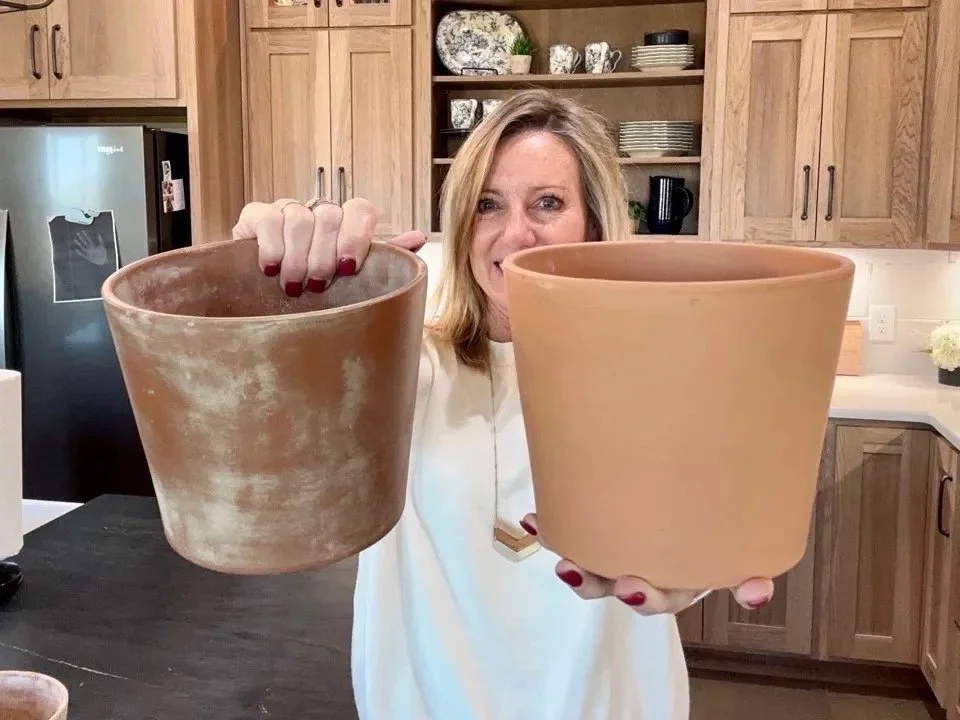
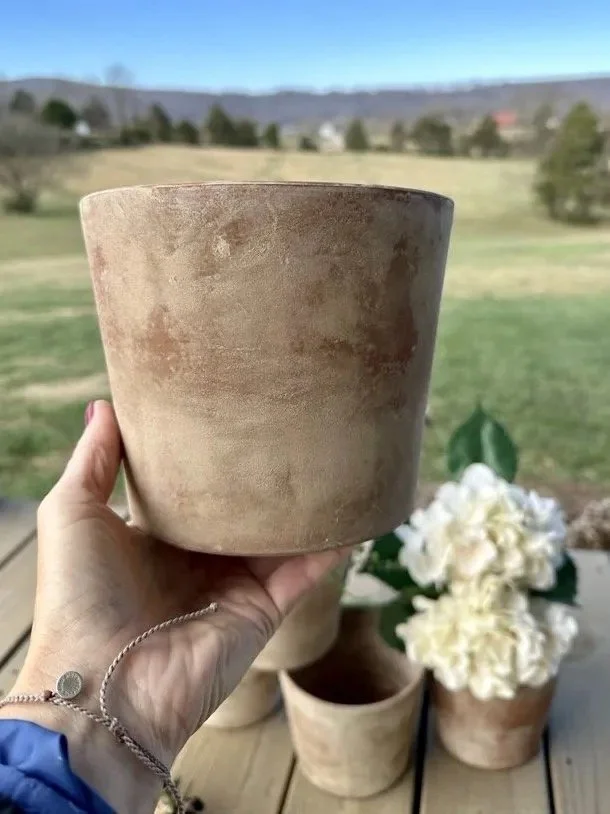
I started with the terra cotta pot on the right and within a few minutes (maybe 30), I had the aged terra cotta pot on the left! So EASY! So FUN! So PRETTY!
How I Aged My Terra Cotta Pots Using Lime
Materials:
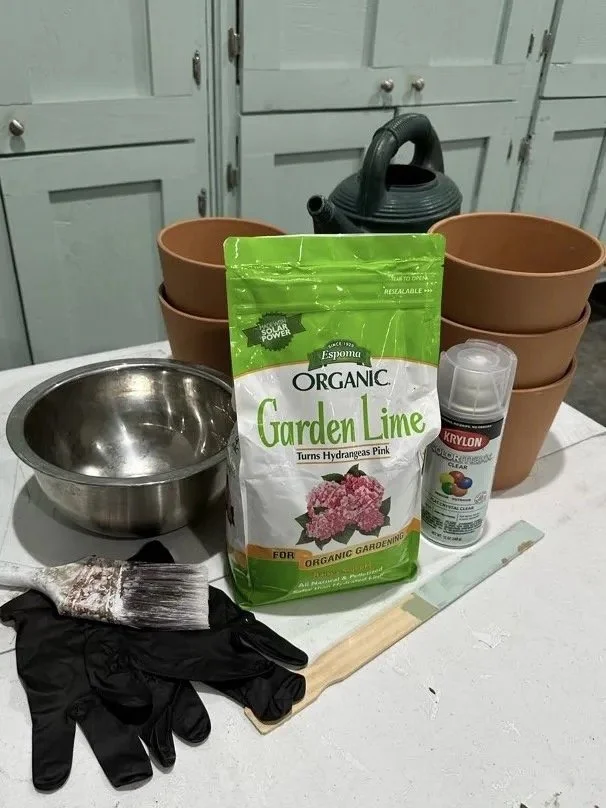
I used these materials to age my terra cotta plants with lime. The only items missing from this picture are the sanding block…and something to cover the work surface. A MUST.
Terra cotta pot
Lime
Water
Brush (foam might have been easier and could be tossed afterward, but I used a regular paintbrush.)
Mixing bowl (could be a paper bowl or plastic cup for easy clean up)
Paint stick or plastic spoon to mix with
Protective gloves (these black ones are my favorites. They are more expensive but I use them over and over so they end up being cheaper and they feel so much better on.)
Newspapers or something to lay down for easy clean up (This is messy! Yay! Don’t skip this.)
Sanding block, 220 grit or less is probably best
Spray Sealer
1. Cover your working area.

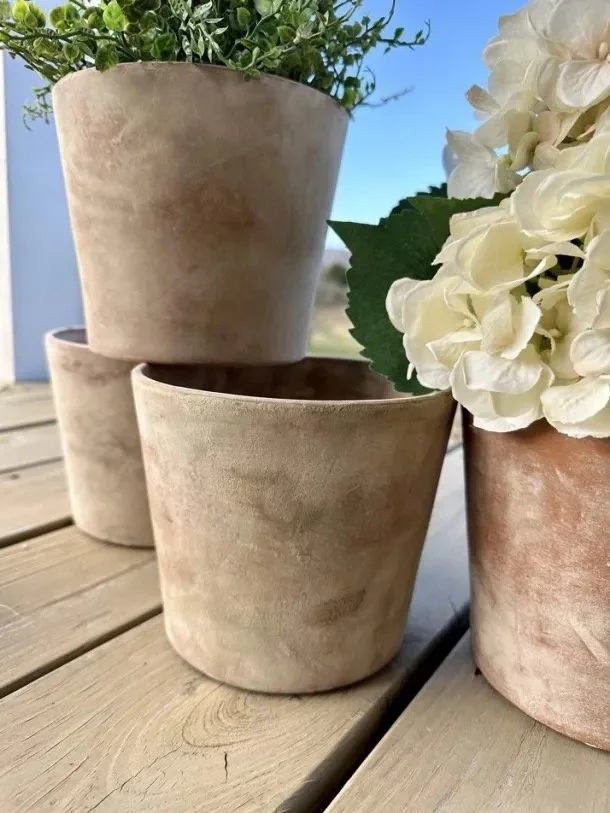
The finished product! I ended up loving all 5 of these terra cotta pots that I aged even though they are all different.
Cover your working area with some newspapers or something you can toss later.
(This is secret #1 and don’t think it’s not a big one. You’ll thank me. You’re about to make a mess. I didn’t do this and wished I had. I had a small cardboard box but it wasn’t enough.)
2. Combine the lime and water.

Combine the lime (about a half cup) and water (about a half cup.) Stir and be prepared to keep stirring it throughout the process.
Mix about a half cup of lime with a half cup of water.
Stir that up.
It will thicken in a hot minute but can be loosened up again so be prepared to keep stirring.
The secret (secret #2) is to start with this consistency. As you begin working, you can decide what thickness you prefer.
You can add more lime to make your mixture thicker or add more water to thin it out.
This isn't rocket science. Just start working with the 50-50 mixture and adjust it to suit your tastes.
3. Paint on the lime mixture.

The softened look of the aged terra cotta pots is charming and SO EASY to achieve.
Use your brush of choice to paint your lime/water mixture onto the terra cotta pot.
This is such a fun part!!!
(Keep in mind you will be sealing your pot when you are finished. Some of the effects of the lime will be diminished when you spray it so you may want to add more lime than you think.)
You have options here.

Aging terra cotta pots with lime is easy because there are no set rules. You can create a unique look every time you do it. So pretty!
Option 1:
You can put on a thin, watery, light coat first and use very uniform strokes.
You can add layers to this as you want or leave it with just one coat.
If you are familiar with whitewashing, this ends up feeling like that process.
In the past, I have whitewashed pots with actual paint and used this method of uniform brush strokes and loved it.
I whitewashed this terra cotta pot with paint a couple of years ago. I love the way it looks but I prefer the look of the lime wash. The lime wash looks more natural and adds texture to the pot.
I think the secret (secret #3) on this is to be careful to avoid the paint running down the pot.
I kept brushing the watery mixture around the pot to prevent run marks. Problem solved.
Alternatively, you can mix up your brush patterns.
Brush the lime mixture up and down, left to right and diagonally.
I chose this option on one of my pots and even dabbed my brush on the pot a bit to experiment.
When I sealed it at the end, a good deal of the lime came off but it is one of my favorites.
You can see a lot of the original clay pot but the color is muted a bit.
I applied a couple of coats of the lime mixture to this pot. I ended up going back over it with my brush to mix up the brush marks.
Option 2:
This terra-cotta pot came out great. I like being able to see a muted version of the original pot in a few spots.
Instead of a light coat of the lime mixture, put on a much thicker layer.
When your lime/water mixture settles, it thickens at the bottom of your bowl.
To get a different effect on your terra-cotta pot, you can let your lime/water mixture settle and thicken, scoop some thicker mix onto your brush, and put it onto the pot.
Then just spread it around the pot.
This will give you more texture on your container.
You can keep your brush strokes uniform if you want.
Or brush it on in different directions and opt for an uneven texture.
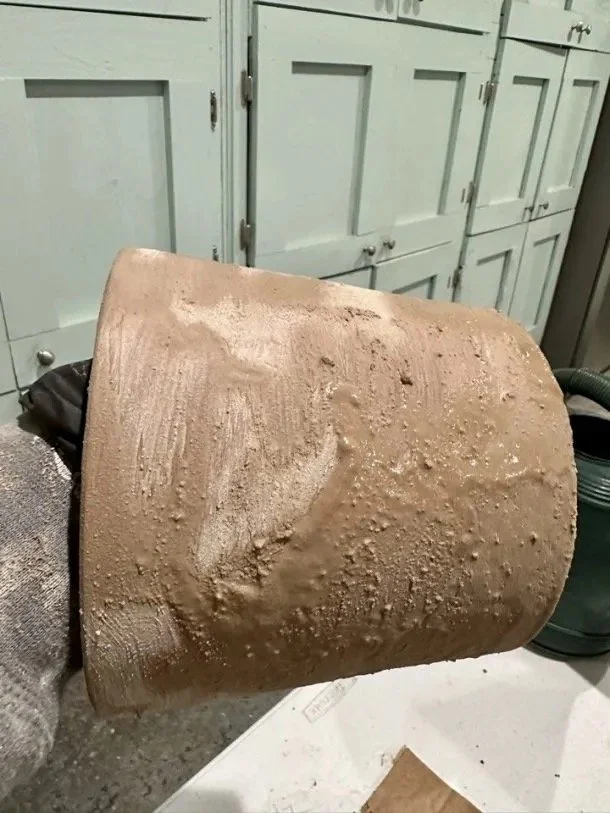
I applied a thick coat of the lime mixture to age this terra cotta pot.
I chose this method for the remaining terra cotta pots I had. I just kept experimenting with different thicknesses.
The secret (secret #4) with this ‘technique’ is to leave a thicker application in some areas than others.
I hesitate to call it a ‘technique’ because I basically globbed it on in places and made it thinner in others.
Don’t worry about getting too much because you can easily sand it off after it dries.
And if you wish you had added more mixture after it dries, YOU CAN ADD MORE.
See how easy this is?
4. Let your terra cotta pot dry.
It’s so much fun to try different techniques to get the result you want when aging your terra cotta pots with lime. All of mine looked different in the end but I love them all. There’s no way to fail at this.
It will take no time for your pot to dry.
Turn around 3 times, do a jig, and it will be dry.
Of course, it depends on how thickly you applied the lime/water mixture.
If you put a thick coat on, count on doing several jigs.
5. Sand your terra cotta pot.

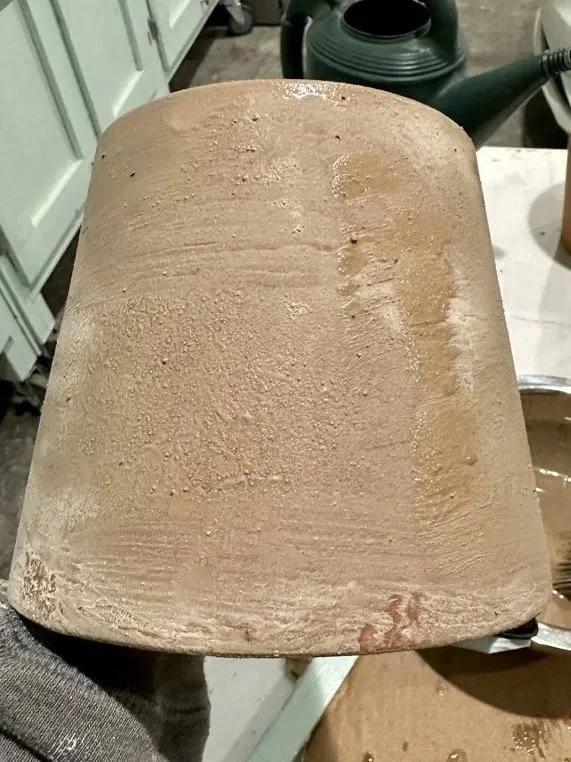
I had just sanded this terra cotta pot. You can see the scratches from the sanding block. I ended up using my hand to rub on the pot to blend the scratch marks.
Now it’s time to sand your pot to make it look just how you want.
(If you like the look of your pot as it is, move on to the next step.)
I sanded my limed terra cotta pot up and down and all around and diagonally to mix up the scratches the sanding block made.
I wasn’t crazy about seeing my sanding block scratch marks so I ended up using my gloved hands and just rubbing on it in places where I wanted to blend the scratch marks. (Another secret! #5, right?)
When I used my hands, the lime just came right off. I was surprised by how easily.
I left some sections on my pot thinner and others thicker.
I ended up liking the texture the thicker lime mix gave my terra cotta pot.
(Note: this is the messiest part of the process. If you have some newspapers laid down, you’re golden.)
6. Spray your terra cotta pot with sealer.

The terra-cotta pot darkened after I sealed it. The lime washes away a bit when you spray it. Take that into consideration when applying the lime as you age your terra cotta pot.
The last step is to spray your terra cotta pot with sealer.
I hated to have to seal it because I was afraid of how the layer of sealer would affect the look of my pot. (I had it just how I wanted!)
In the end, the sealer did wash off a bit of the lime and somewhat deepened the color of the pot.
I LOVED IT!
I ended up loving all the pots I limed, and NONE looked the same.
Be careful to use thin even coats with your sealer spray.
You don’t want to have run marks from your sealer after all that work. (It's not that much work.)
It seemed like the lime was still a bit suspect of being easily washed off.
I ended up applying two coats of sealer and wouldn’t be opposed to three.
Wrap-Up
I can’t tell you how much fun I had aging these terra cotta pots. The results were better than I imagined and the process is no-fail.
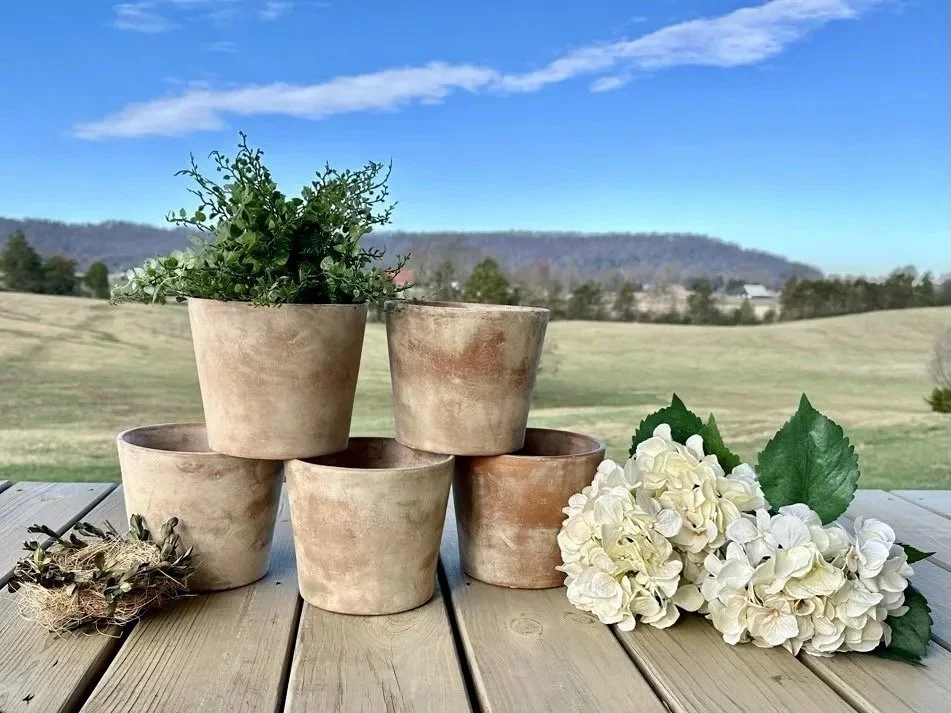
The final product was 5 sweet terra cotta pots that had been transformed from orangish brand-new-looking to softened and aged. (May we all soften as we age.)
I am just crushing on all 5 of these little creations.
I enjoyed doing this even more than I thought I would.
It was easy for one thing.
But it also took next to no time. It took me longer to clean up than anything.
(Insert secret #1: lay down newspapers or something you can throw away at the end for easy cleanup. You’re welcome.)
And the transformation is pretty dramatic.
I also like that you don’t have to color inside the lines on this project.
There is no right or wrong. It’s your pot. Make it look like you want!
But if I were grading yours, it would be a guaranteed A+. So get started on this fail-proof project!